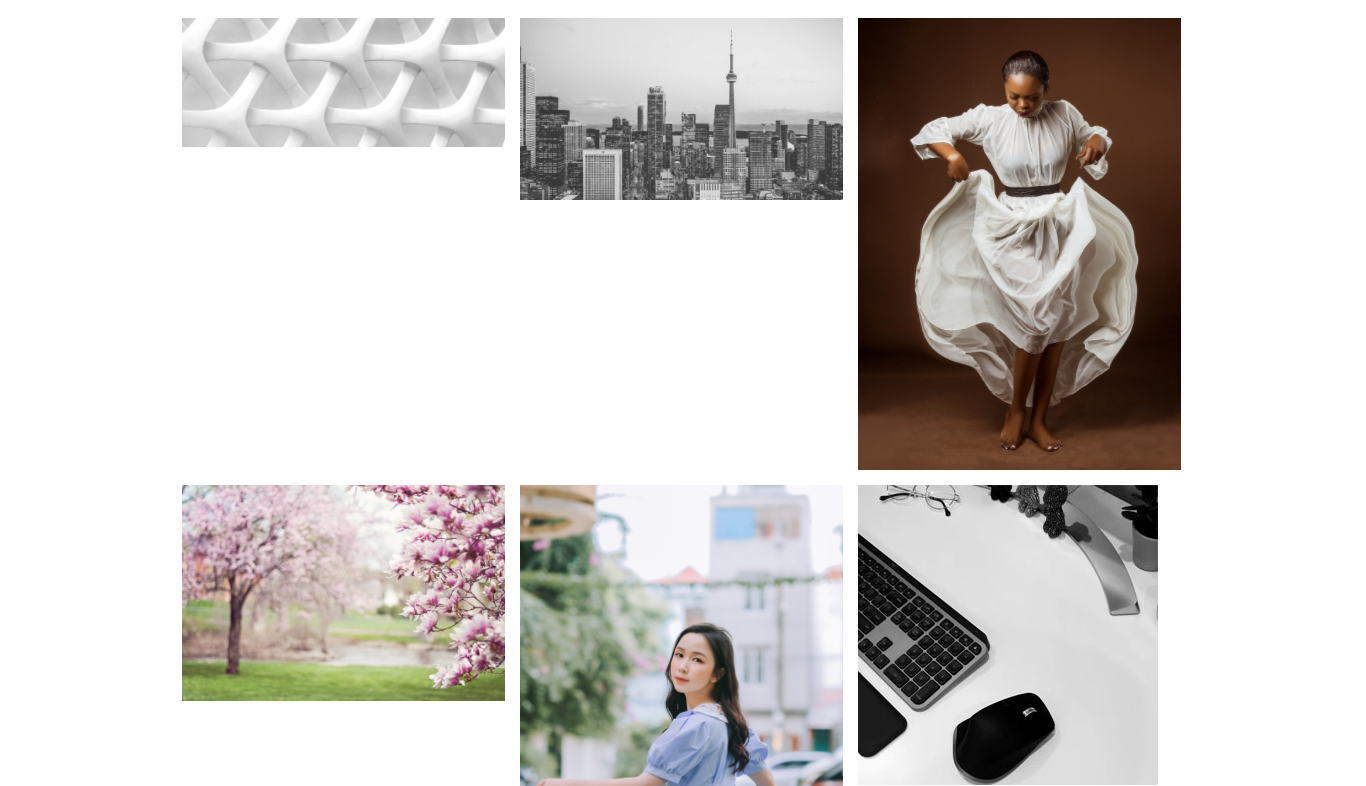
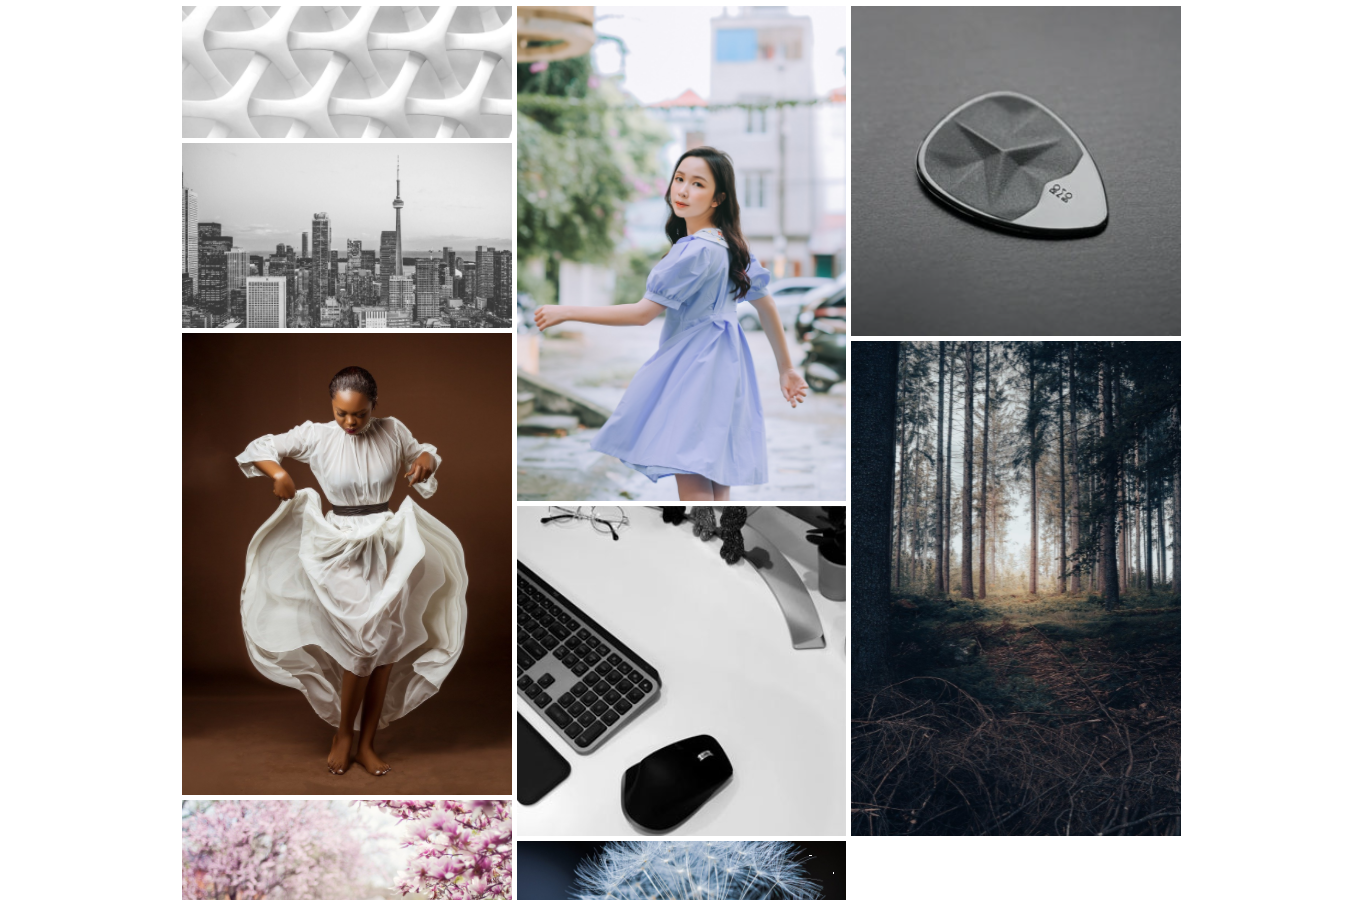
Ultimate Addons for Gutenberg 1.24.0 added a Masonry layout option to the Gutenberg Gallery block. This document will show you how to use this option to create your masonry image gallery.
How Does Masonry Layout Works?
Creating a great-looking gallery can sometimes be a demanding task, especially when combining images of different sizes and orientations.

Usually, you would need to edit your images properly before uploading. This way, your gallery would look neath, and you would avoid essential parts of some images getting cropped.
However, there is a way to make things much simpler. The masonry gallery layout sets the same width for all images while maintaining different heights. Thus, you will get all the different images perfectly combined into a beautiful and exciting gallery with the masonry layout.

How Can I Create Masonry Image Gallery?
You can add your masonry gallery to any page or post. Follow these steps to create your masonry gallery:
Step 1 – Open the page or post Block editor, and add a Gallery block;
Step 2 – Add images to your gallery by clicking the “Upload” or “Media Library” buttons. This will depend on where your images are located;
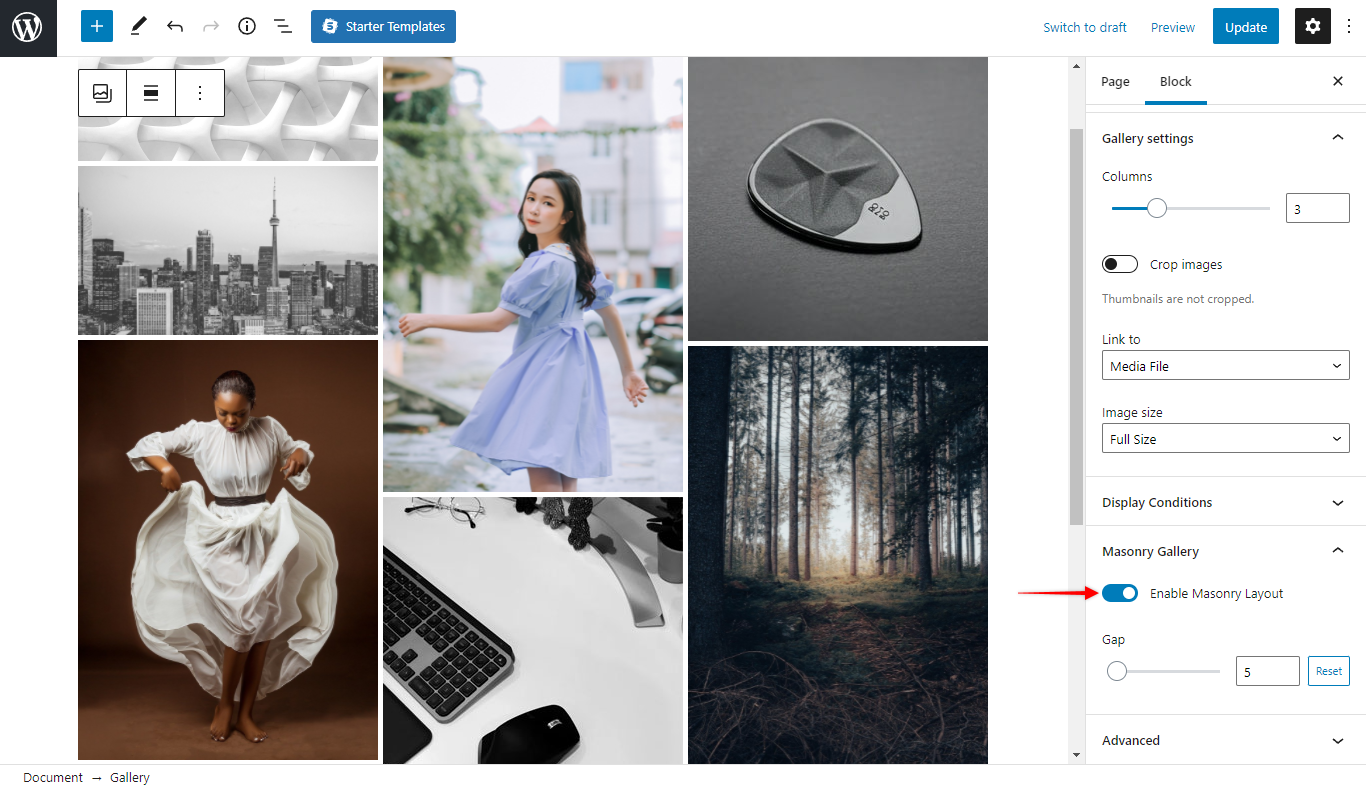
Step 3 – In the block settings on the right side, scroll to “Gallery Settings”. Here, you can select the number of columns for your gallery;
Step 4 – Further, scroll down to “Masonry Gallery” and click on “Enable Masonry Layout”. This will switch your standard gallery layout to a masonry layout;

Step 5 – Also, you can set the “Gap” size. This will set the size of the space between your gallery images;
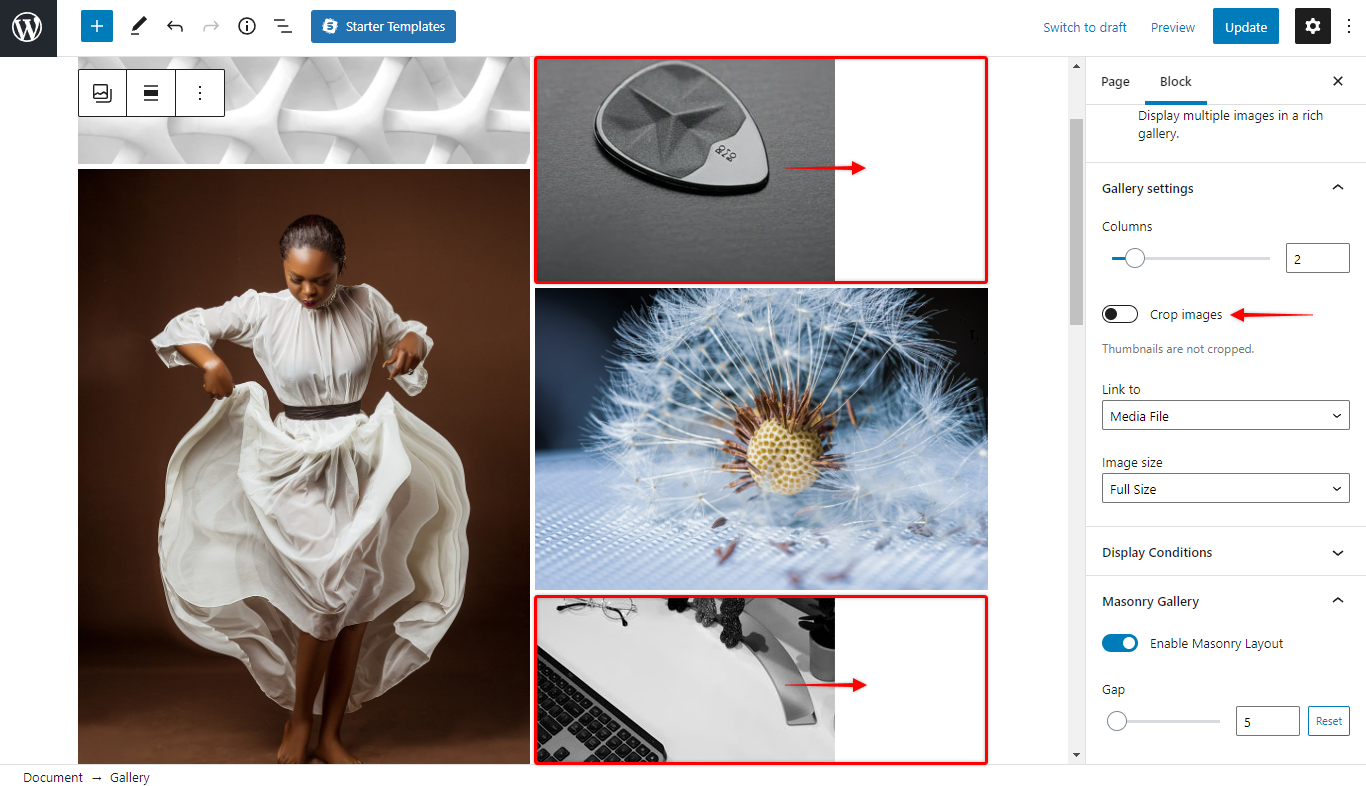
Step 6 (Optional) – Finally, in case the width of some images is too small, you might notice empty spaces. Now, you can set images to cover the whole area perfectly by enabling the “Crop Images” option. Find this option in the “Gallery Settings”.
